- development: to test your AI system during development, helping you track improvements across versions.
- monitoring: to continuously test your live AI system serving requests.
Prerequisite: you need an Openlayer account
to follow this guide.
1. Find a template
To accelerate the setup, we use templates. Templates are sample projects that use common AI patterns and tools, and that already contain the configurations required by Openlayer.1.1 Create a project
1.1 Create a project
First, you must create a project.Navigate and log into Openlayer. Click the “plus” button next to “Projects,” on
the sidebar, to create a new project.The project is the place on the Openlayer platform that will house your models, data, and tests.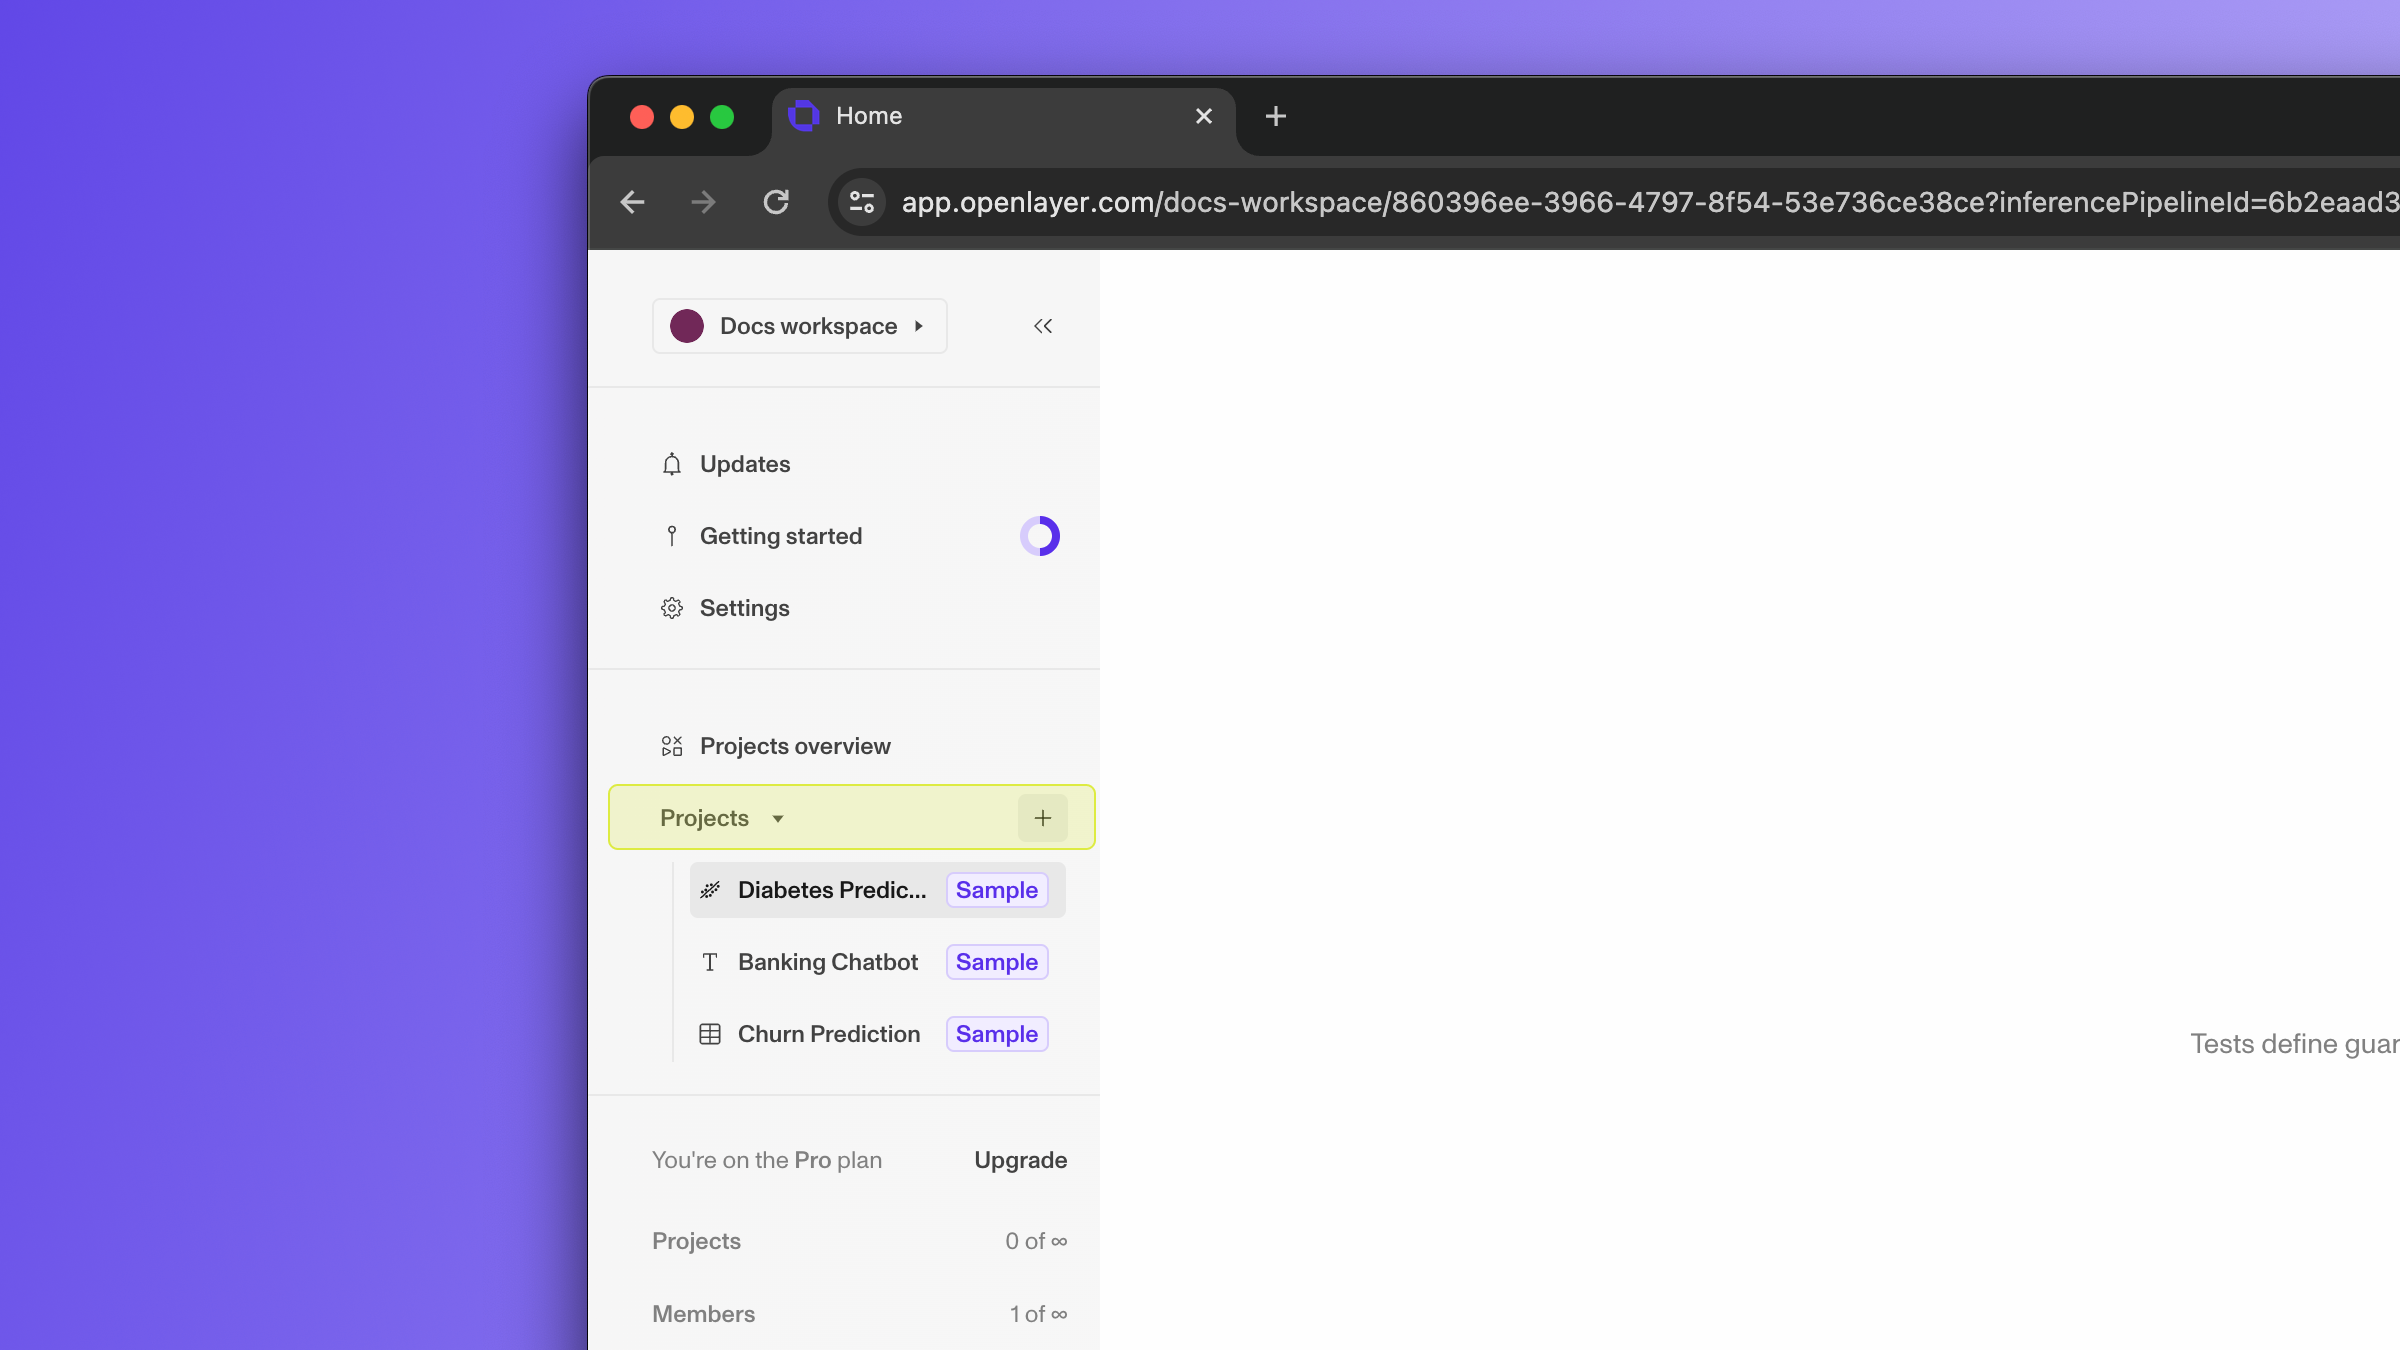
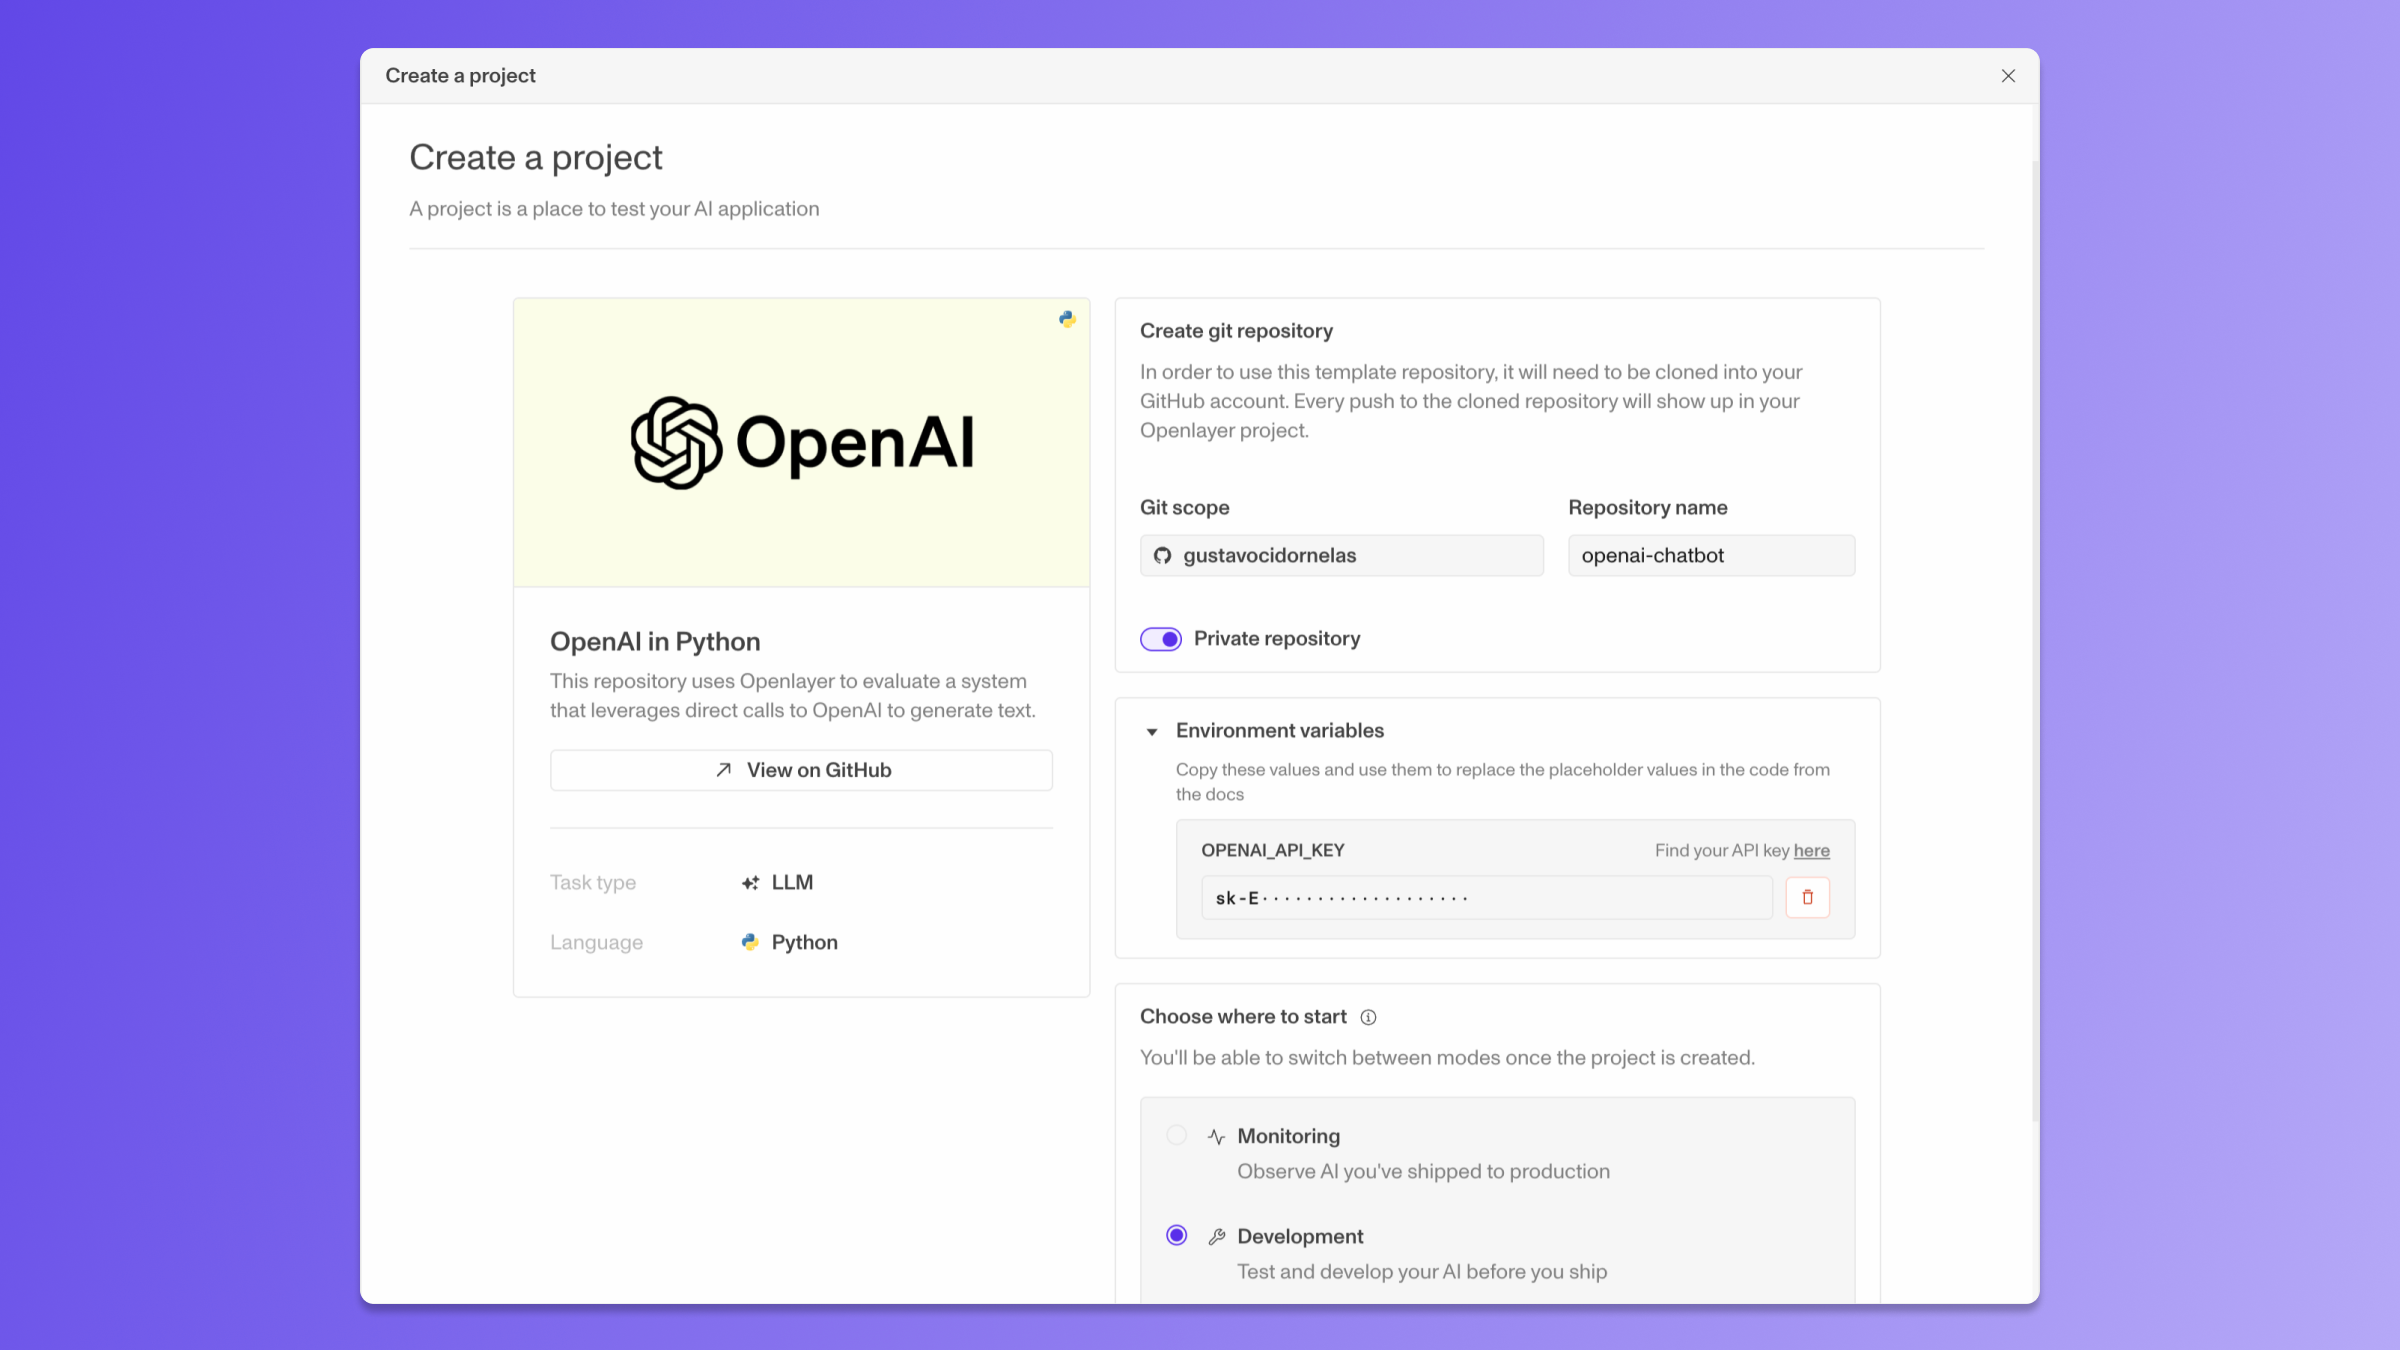
1.2 Choose a template
1.2 Choose a template
Select a template on the modal that appears. You can pattern-match based on
the programming language, the framework, the AI/ML task type, or the use case.Not sure which one to use? How about OpenAI in Python?
2. Create tests
You have a GitHub repo linked to an Openlayer project. You can view the artifacts on Openlayer and start creating tests.2.1 View commit on Openlayer
2.1 View commit on Openlayer
After the GitHub repo is successfully connected, Openlayer will pull your latest commit
and run a series of processing steps. These include validating your files, iterating over your
datasets, and running your model to get its predictions.In your GitHub repo, you can see that Openlayer started to run on your latest commit.
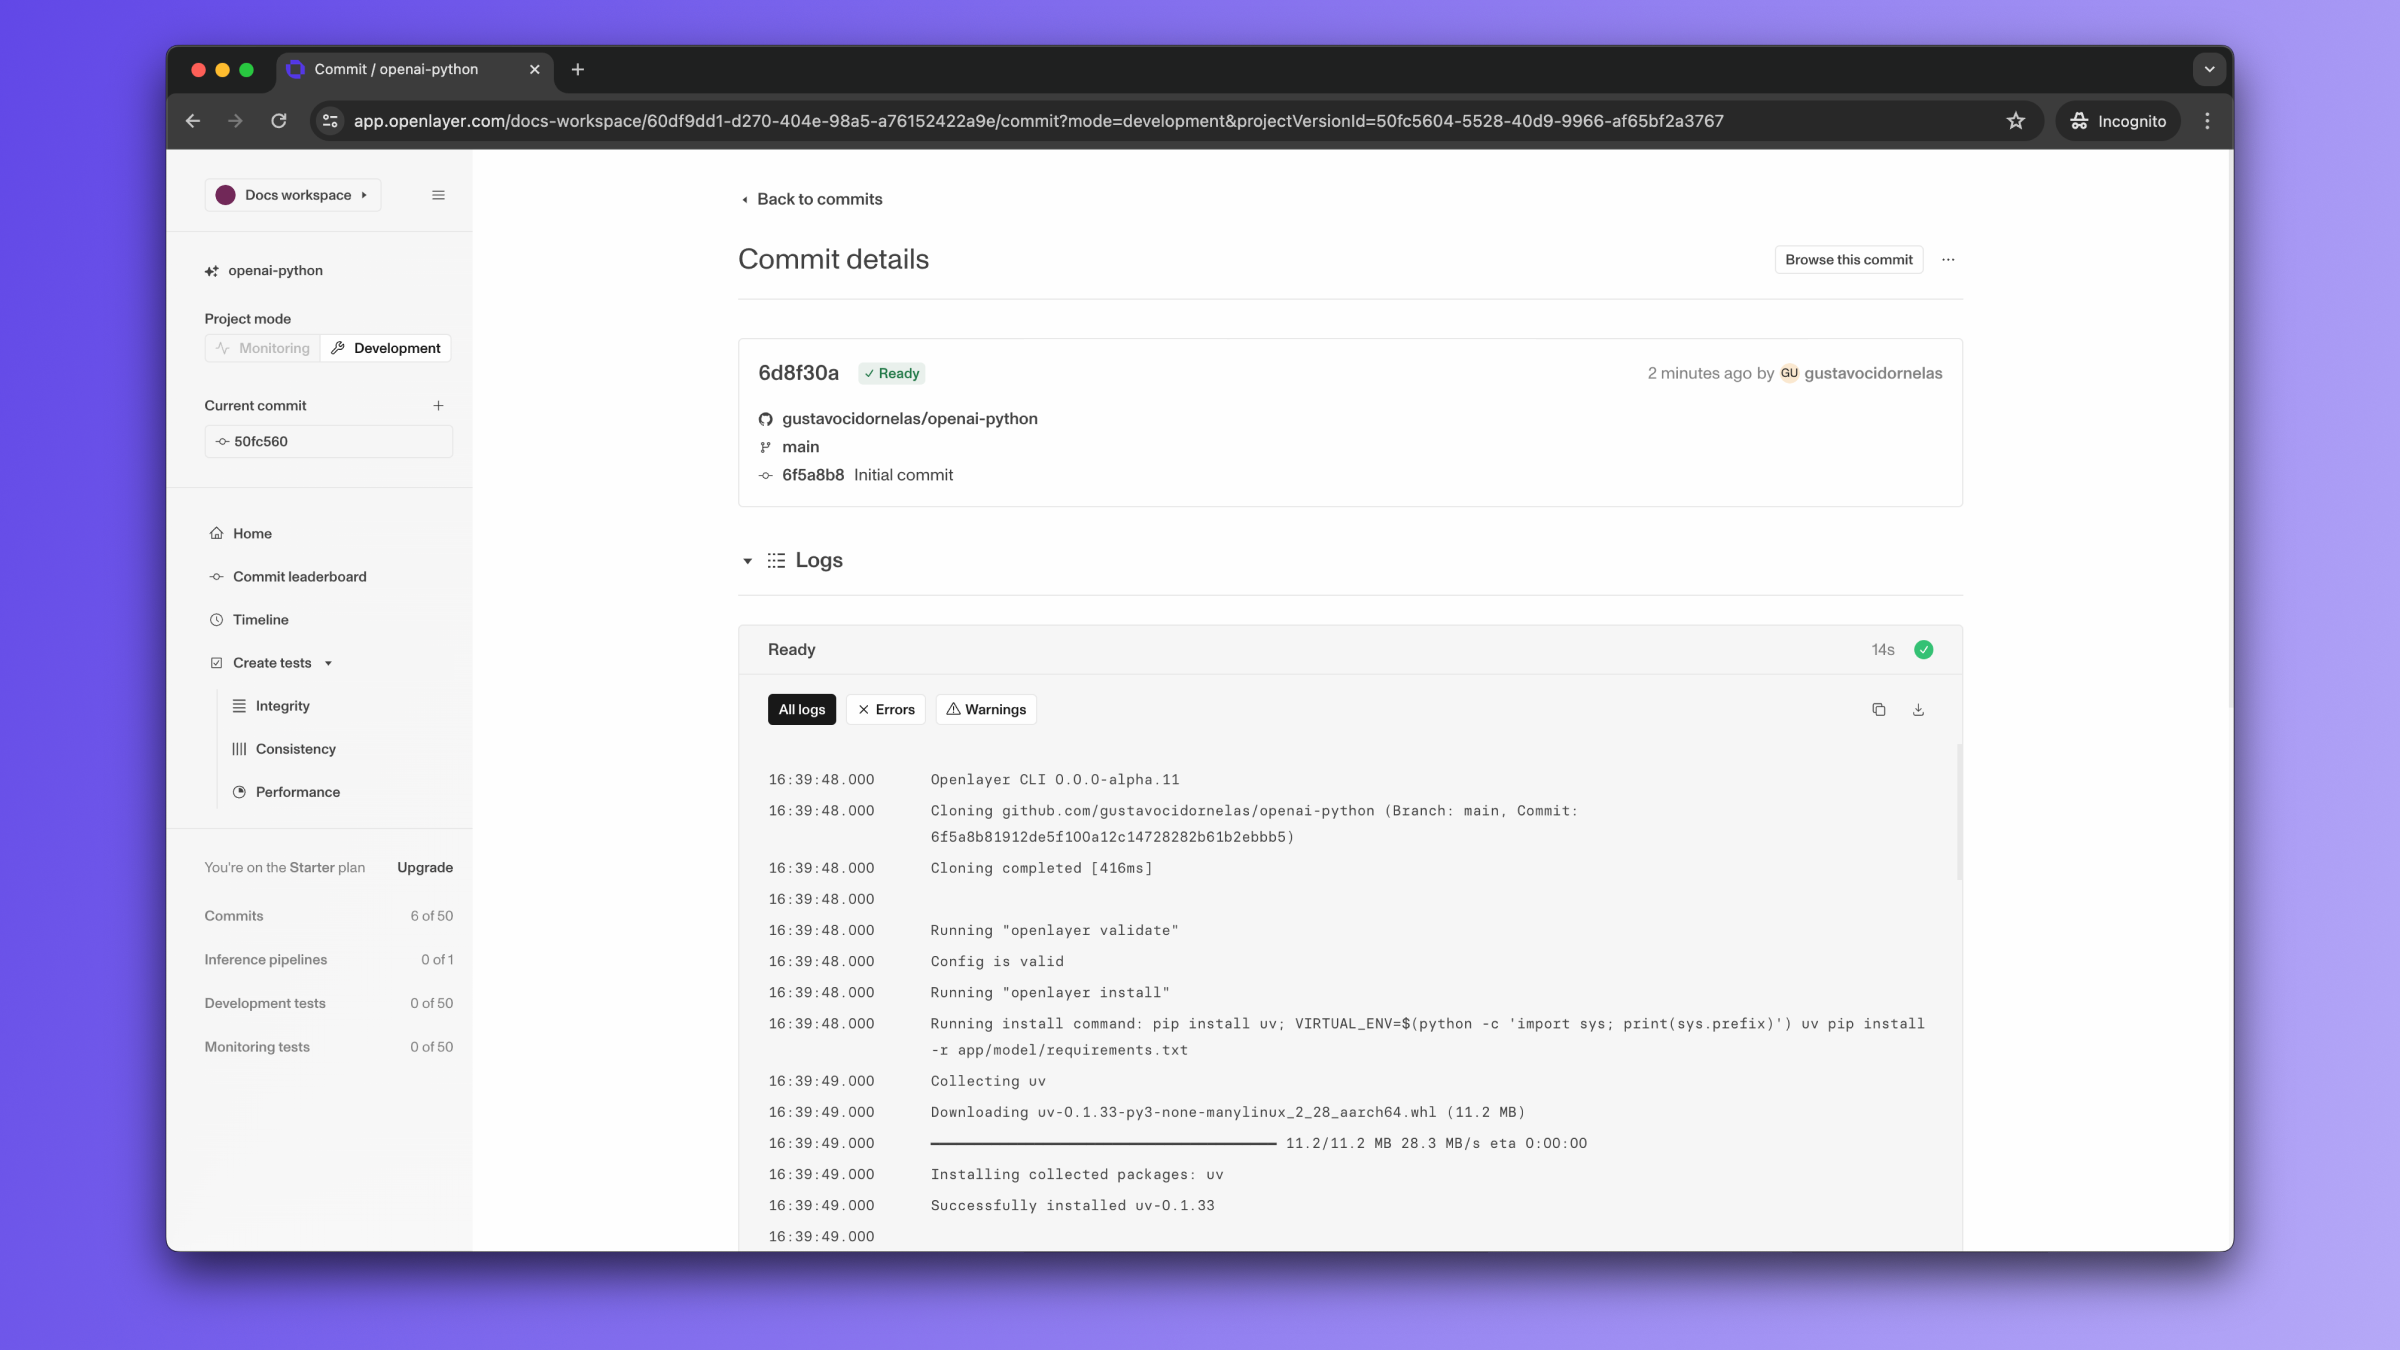
2.2 Create tests
2.2 Create tests
Tests materialize expectations around your model and data. Openlayer offers an ever-increasing
suite of tests targetting different parts of your system.After your first commit, a few general-purpose tests are automatically created. In
this example, some are passing and others aren’t.
3. Make changes
From now on, every version of your system will get evaluated against your tests. All you need to do is keep pushing to your connected GitHub repo.3.1 Push changes
3.1 Push changes
Your new commits to the Git repo will trigger your Openlayer tests.
4. Ship
After some development iterations, you’ll want to deploy your AI system. You can continuously run your tests on your live data.4.1 Switch monitoring on
4.1 Switch monitoring on
The same template repo has all the information needed to use Openlayer’s monitoring mode and log your live requests to Openlayer.In general, you’ll only need to set a few environment variables that specify your Openlayer API key
and project name.As your system receives live requests, they are streamed to the Openlayer platform, where you can see
their traces, and define tests that run periodically on top of your data.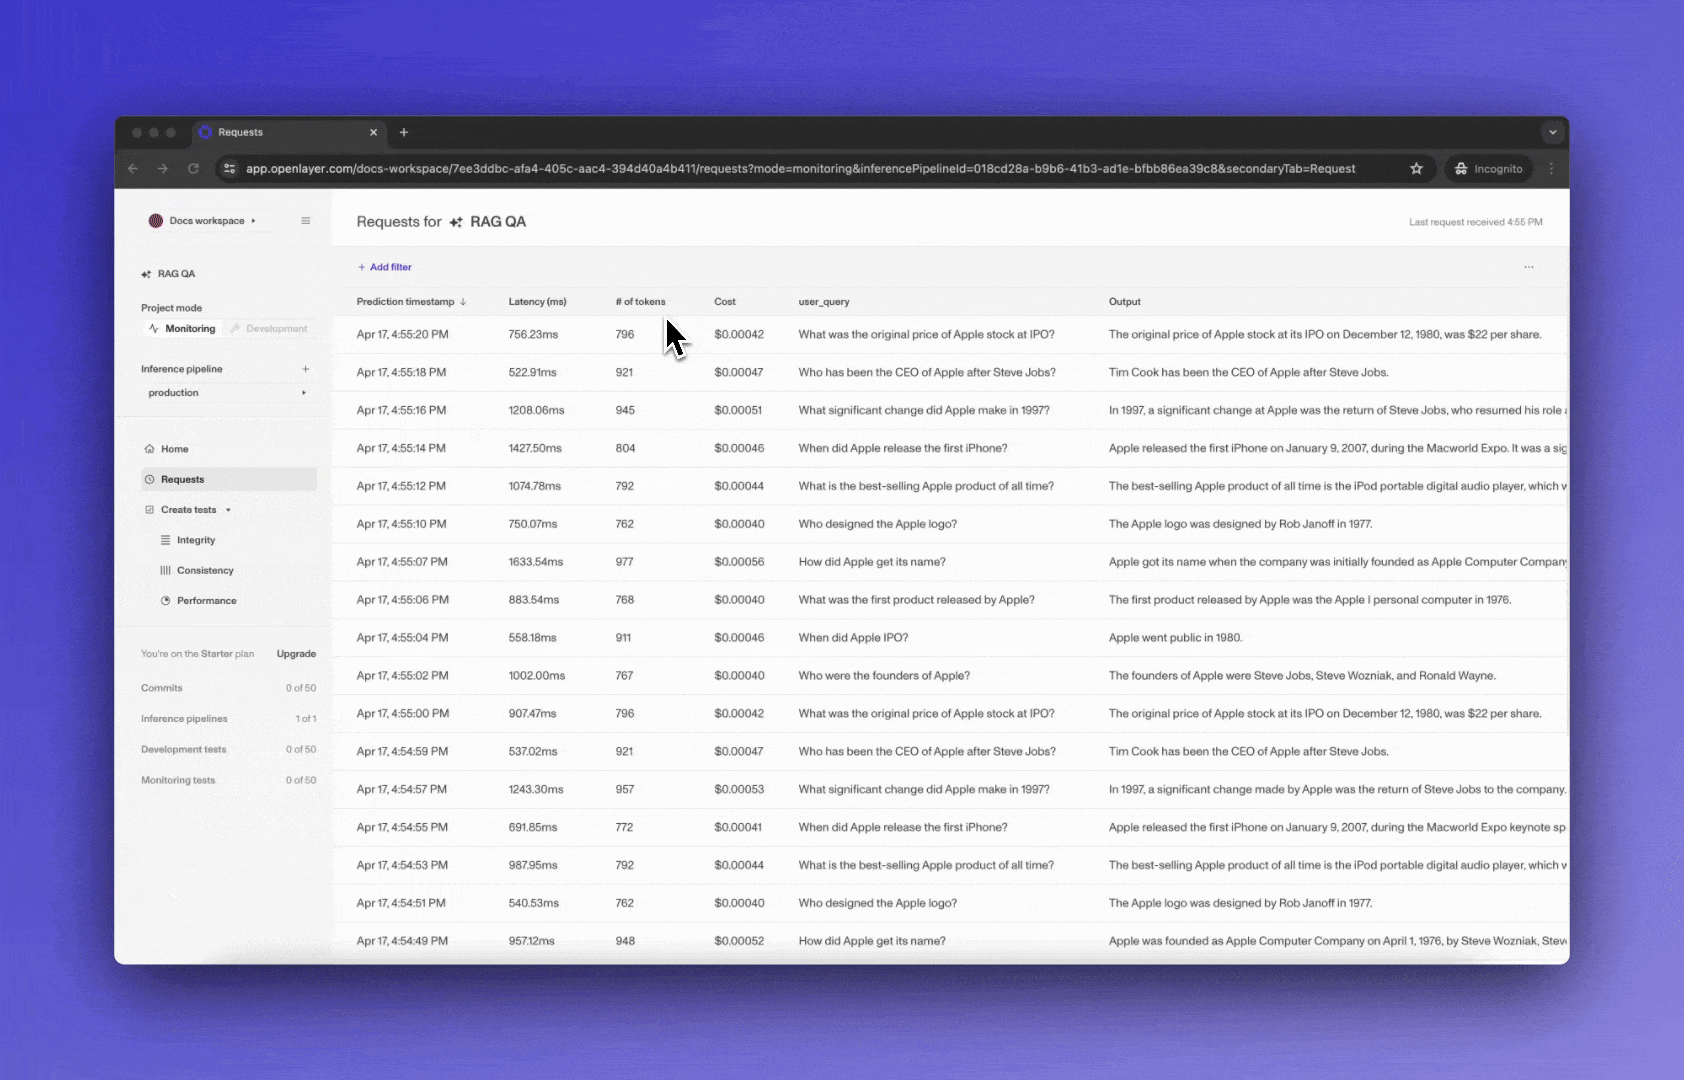 You can set up alerts to get notified immediately if your tests start failing.Refer to the template README and the Monitoring overview for details.
You can set up alerts to get notified immediately if your tests start failing.Refer to the template README and the Monitoring overview for details.